Introduction: A Clear Roadmap to a Perfect Door
Successful projects start with a plan. For Palm Beach County homeowners, understanding the sequence of garage door installation steps helps you coordinate schedules, set expectations, and avoid surprises. With the right team, materials arrive on time, permits are handled correctly, and the finished result looks and works exactly as intended. Early in your planning, consider consulting a local specialist for garage door installation so you can align design choices, wind-load requirements, and smart features from the outset.
What follows is a detailed, homeowner-friendly walkthrough of each major stage—from the first site review to the final inspection. Use it to evaluate bids, compare scopes, and confirm that your installer’s process is thorough and compliant with Florida standards.
Step 1: Site Assessment and Measurements
The process begins with measurements that go beyond width and height. A pro will verify headroom, sideroom, and backroom, ensuring that the track, springs, and opener all have the space required to operate smoothly. They will inspect jambs, headers, and the slab for level and straightness, note utility locations, and identify obstructions like storage racks or water heaters.
Accurate measurements minimize change orders and speed installation day. You’ll also discuss door construction (steel, composite, aluminum-and-glass), insulation values, window layouts, and finishes suitable for coastal sun and humidity.
Step 2: Code Review, Wind-Load Selection, and Permitting
Florida’s building code emphasizes wind resistance. In Palm Beach County, your installer will specify wind-rated doors that match your home’s exposure and design. If impact considerations apply, the team will recommend appropriate glazing or non-glazed solutions. Permit applications typically include product approvals and drawings, which your installer should prepare and submit.
Early code review avoids delays later. Your provider will coordinate with your municipality, plan for inspections, and build a schedule that accounts for permit issuance timelines.
Step 3: Style and Hardware Finalization
At this stage, you select the appearance: raised-panel steel, carriage-house designs, modern glass, or custom composites. Color, texture, and window options shape curb appeal. Hardware choices—rollers, hinges, tracks, and spring types—affect durability and noise levels. In our climate, corrosion-resistant components are a wise investment, and insulated door sections can stabilize temperature and block street noise.
If your community has HOA guidelines, your installer can provide submittal packets and samples for quick approvals. This prevents last-minute changes and keeps your timeline intact.
Step 4: Opener Specification and Smart Features
Openers should be sized to the weight and construction of the door. Quiet belt-drive motors are ideal for garages near bedrooms; wall-mount units save ceiling space and reduce vibration. Battery backup is valuable during outages, and smart controls allow app-based operation, alerts, and temporary access codes for guests or service providers.
Safety sensors, auto-reverse, and soft-start/soft-stop features enhance daily use. Your installer will confirm compatibility between the door, track type, and opener system to ensure smooth, reliable travel.
Step 5: Pre-Installation Preparation
Leading up to installation day, the team orders materials, schedules delivery, and confirms access. You may be asked to clear the garage perimeter and move vehicles. If you are replacing a door, crews plan for safe removal and disposal of the old system. Any necessary framing touch-ups, trim adjustments, or header reinforcement will be outlined so there are no surprises.
Good preparation means the crew can work efficiently and keep the site neat. Communication about parking, noise, and timing is especially helpful in HOA communities.
Step 6: Removal of the Old Door
Safe removal is essential. Tension is released from the old spring system, sections are detached, and hardware is disassembled in a controlled sequence. Professional crews follow strict safety procedures to protect people and property. Proper disposal and recycling are handled according to local guidelines.
With the opening clear, the installer inspects the framing again to verify a clean, square base for the new components.
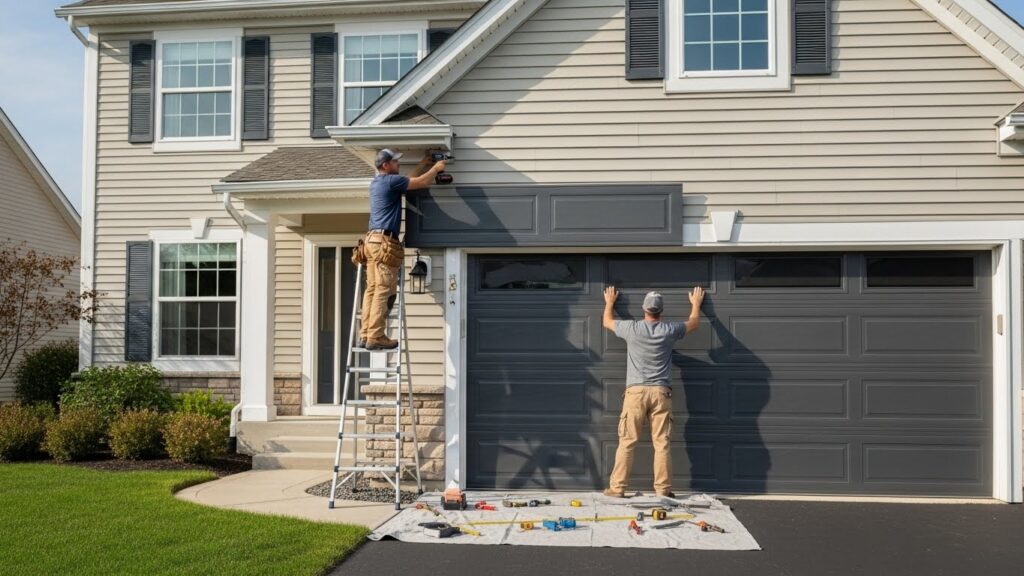
Step 7: Track, Spring System, and Section Installation
New track is plumbed, leveled, and fastened to the framing with appropriate anchors. Reinforced struts and brackets are selected according to the door’s wind rating. The spring system—typically torsion for residential sectional doors—is set up to match door weight and size. Section by section, the door is assembled, aligned, and secured, ensuring smooth seams and even reveals.
Attention to detail here affects performance for years to come. Quality rollers, properly adjusted hinges, and correctly tensioned springs reduce noise, ease opener workload, and deliver balanced travel.
Step 8: Opener Mounting, Controls, and Safety Systems
The opener rail is aligned with the door, or a wall-mount unit is installed beside the shaft. Photoelectric sensors are positioned at the correct height, tested for alignment, and secured against accidental movement. Wall controls, remotes, and keypads are paired and programmed. App integrations are configured, and backup batteries are tested.
Crews verify that the door stops and reverses properly on obstruction and that force settings meet manufacturer guidelines. Lighting, travel limits, and speed are fine-tuned for everyday convenience.
Step 9: Weatherproofing and Finishing Touches
Perimeter weatherstripping and bottom seals are fitted to block drafts, dust, and pests. In coastal neighborhoods, additional seals or thresholds may be recommended for enhanced protection against wind-driven rain. Decorative hardware, window inserts, and trim details are installed and aligned to match your design intent.
After cleanup, the site is left neat, with packaging removed and old materials hauled away. Your garage should look organized and ready for immediate use.
Step 10: Inspection, Documentation, and Homeowner Orientation
Once the door and opener are operating correctly, your installer coordinates required inspections. Documentation—product approvals, permits, and installation notes—should be provided for your records. During orientation, you will learn how to use the controls, test safety features, and perform basic maintenance.
Before the crew departs, ask questions about lubrication intervals, Wi‑Fi connectivity, keypad programming, and recommended service schedules. A short tutorial now helps you enjoy worry-free operation later.
Maintenance Tips to Maximize Longevity
- Inspect rollers, hinges, and hardware twice a year; listen for new noises.
- Clean door surfaces with mild soap and water to remove salt and dust.
- Lubricate moving parts with appropriate products—avoid over-application.
- Test safety sensors and auto-reverse monthly for reliability.
- Schedule periodic tune-ups to maintain spring balance and track alignment.
Common Pitfalls and How to Avoid Them
- Skipping permits or documentation, which can delay inspections.
- Under-sizing the opener for a heavy, insulated door.
- Overlooking HOA requirements for style and color.
- Choosing appearance over wind-load and impact considerations.
- Attempting DIY adjustments to springs or cables.
Frequently Asked Questions
Q: How long will the entire process take? A: After design approval and permitting, most installations are completed in a day. Lead times depend on material availability, selected options, and municipal scheduling for inspections.
Q: Do I need an insulated door in South Florida? A: Insulation helps stabilize garage temperature, reduce noise, and improve comfort in adjacent rooms. It is especially useful if you use the garage as a workshop or home gym.
Q: How are wind-load requirements determined? A: Your installer will assess your location and home design to select doors with appropriate reinforcement and track hardware. They will present documentation showing compliance with applicable standards.
Q: Can I reuse my existing opener? A: If it is compatible and meets current safety standards, you may keep it. However, many homeowners upgrade to quieter, smarter openers for reliability and convenience.
Q: What should I do to prepare for installation day? A: Clear the area around the door, move vehicles, and provide access to outlets and Wi‑Fi if smart features are being set up. Your installer will handle the rest.
Q: How often should I schedule maintenance? A: An annual tune-up is a good baseline, with quick checks after storm season. Service visits keep springs balanced, reduce wear, and catch issues early.
Q: Will new weatherstripping help with pests and dust? A: Yes. Modern seals can significantly reduce drafts, dust intrusion, and small pests. Your installer will choose seals appropriate for your door profile and threshold.
Q: Are glass-and-aluminum doors viable in Palm Beach County? A: Yes, when specified with reinforced frames and appropriate glazing. Your installer can recommend options that balance aesthetics with local wind considerations.
Putting It All Together
Following a clear, step-by-step process turns a complex project into a predictable, stress-free experience. With accurate measurements, compliant products, professional installation, and thoughtful orientation, you gain a door that looks beautiful and performs reliably in South Florida’s demanding climate.
When you are ready to plan your project with a team that knows the local process and can coordinate permits, inspections, and smart features, consult specialists who focus on high-quality garage door installation. A streamlined plan today leads to years of confidence and convenience.